
Mixing textures in Bryce
In this tutorial, you will learn how to mix bitmap and procedural Bryce textures to make realistic terrain materials. You will also find out how to make a simple fractal texture from scratch in the Deep Texture Editor.
What you will need to complete this tutorial
Any version of Bryce.
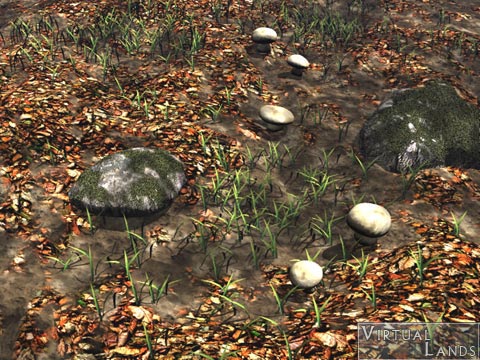
Sample result
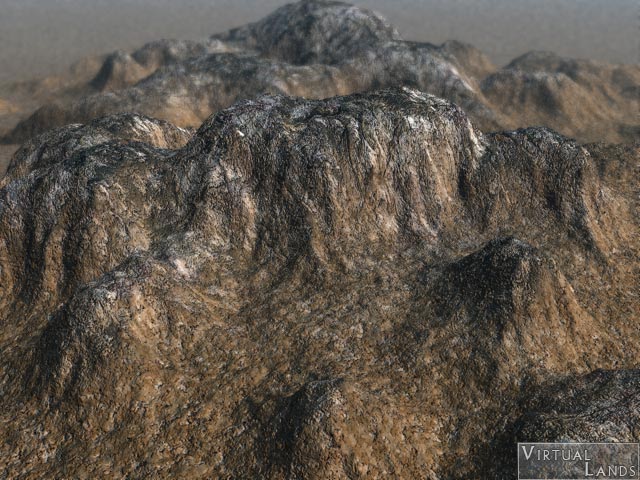
Here is an example of the results you can get with this technique. Note the smooth but irregular transition between the bitmap texture at the top and the procedural texture below.
Getting started
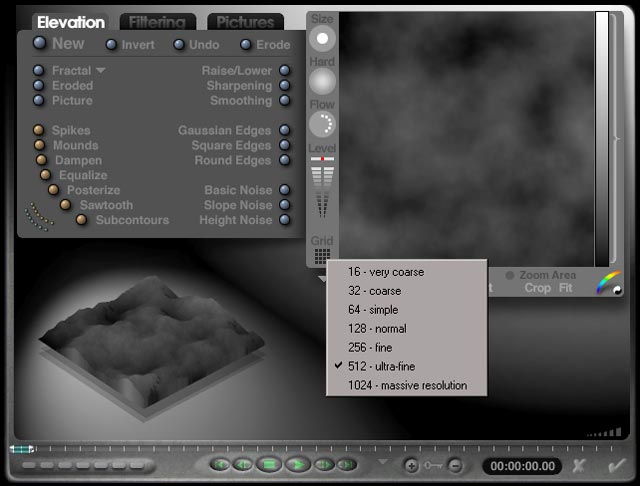
First, ensure that the terrain you are working on is detailed enough. If it has big, sharp bumps, it will not be realistic, even with the best texture you can create. To have enough detail for a close up, I generally choose a 512 pixels grid. Once you have created the terrain, give it a flat grey texture and render it to see if it has any default. If not, you can start texturing it.
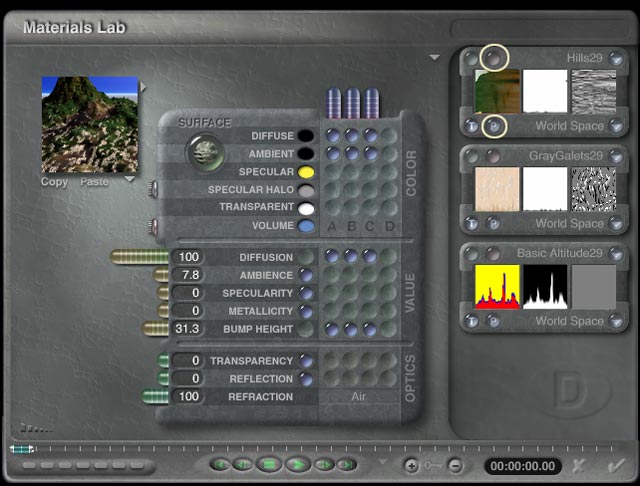
Go into the Materials Lab and choose the whole mountain material from the presets. This material was used by Eric Wenger in his famous "eternal" scene, that made the cover of the Bryce 2 box. It is quite interesting because it has what we are looking for: two materials mixed. The texture at the top is also at the top in the resulting image, the one in the middle is at the bottom and the third one is used to control the mix between the first two. What we'll do is use this material with our own textures and tweak it to get the right effect. Click on "p" on the first texture, then on the pink dot to choose a bitmap.
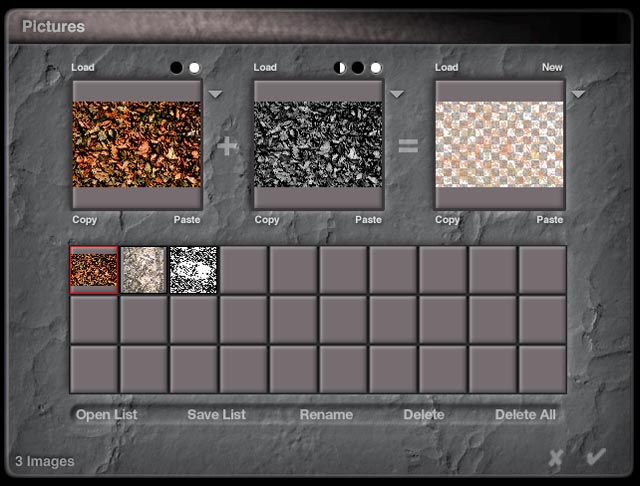
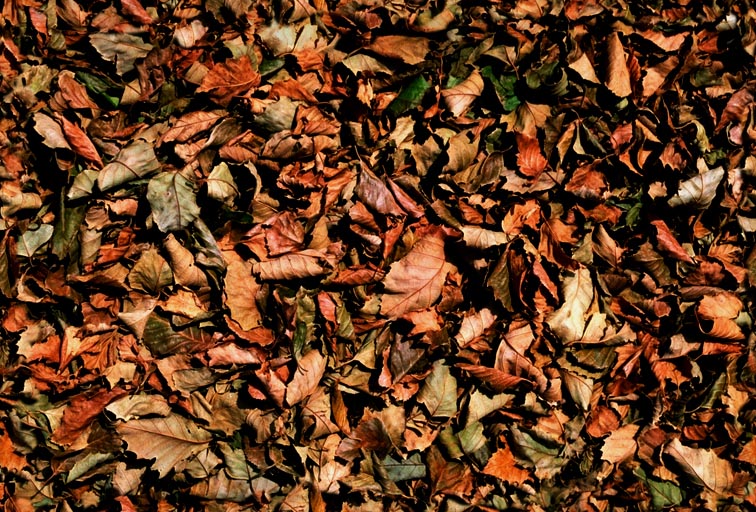
You can find the image I used here. Textures made of photographs have the great advantage of being very realistic, but make sure they are tileable or if not, that they cover an area large enough for your needs. Do not forget to load the image in both the boxes (1) and (2) to be able to use it for bumps.
Then, set the frequency of your texture. This is why having a tileable bitmap is important. For the leaves, I set the frequency to 35. If you use dirt or ground textures, you will probably not have to repeat it that much. Be careful with tiling. If your ground is seen from far enough and your texture does not have many small details, you will see where it repeats itself.
Making the procedural texture
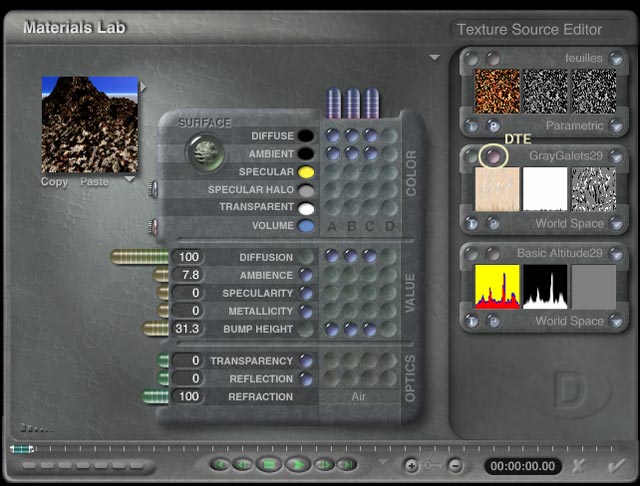
For the second texture, it is better to use a Bryce procedural. Mixing two bitmap textures will probably be realistic, but if you tile both of them, you will not be able to avoid the "repeat effect" described above. This is not a problem with procedural textures as they do not tile. Choose the second texture and go into the Deep Texture Editor (DTE) by clicking on the pink dot.
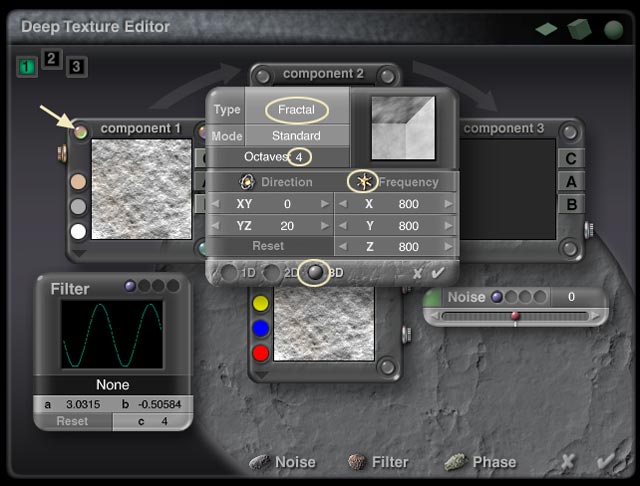
Once in the DTE, you will see the grey galets texture. Get rid of the component in excess, we'll only need the first one. Click on the 2 box to deselect it.
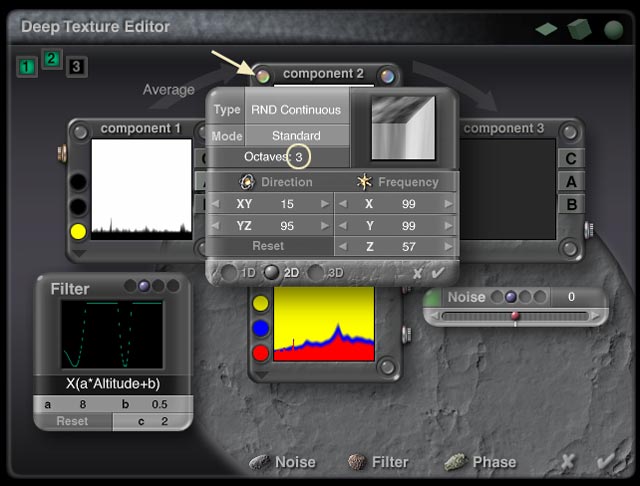
Then set the noise. Choose "Fractal" as the noise type. Other noises are well adapted for a ground textures: "stucco noise", "weird value" or "turbulence" for instance. You can test different modes, but I left "Standard" in that case. Choose the "frequency" and "octaves" of your noise. The frequency determines how big or small your texture details will be. The octaves seem to decrease the frequency but in fact they give smoother, more accurate details. The higher the octave, the higher you will have to set the frequency to get enough details for your texture. Be sure to use a 3D texture, otherwise you won't get details on 3 axes.
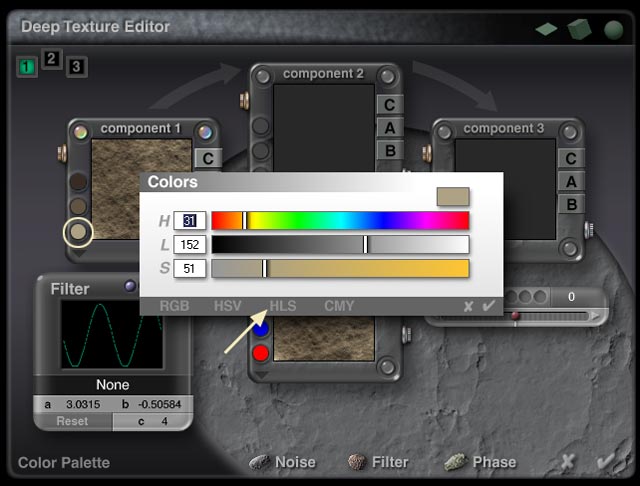
You can then choose the colors you will use for your texture. To do so more accurately, alt click the color dots on the left. I generally use the HSL (Hue Saturation Lighting) selector, which I find more intuitive. For this texture, I chose 3 types of brown. If you are using 3 colors, the best color modes to choose are generally "spline interpol" or "linear interpol3". You access those modes with the vertical arrow below the color dots. On the right of your component window is the output type. C is color, A is alpha (transparency) and B is bumps. Choose C and B, as you don't need transparency information for your ground.
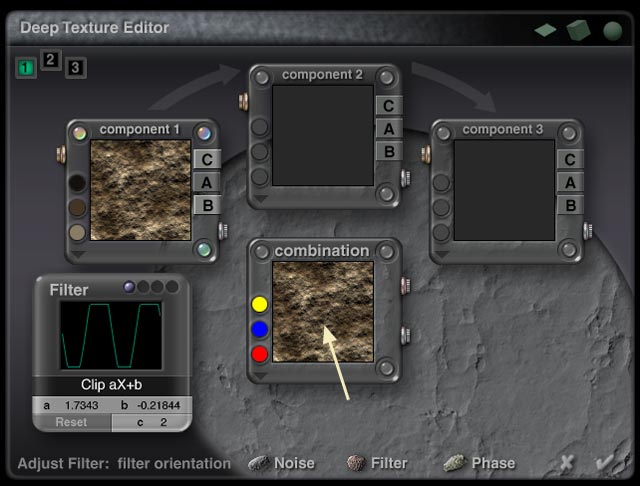
Last step to get a good looking texture, you might have to tweak the filter settings. They dictate how much of each color will be in the final texture and where it will appear. It also influences bumps making them more or less visible. The "a" slider generally gives a better color repartition and more bump when you give it a higher value. Second is the "b" slider. A high value will "raise" the texture and make the third (bottom) color predominant. A low value will do the same for the top color. This will also have an influence on bumps. In the case of this component, very high or very low values give less bumps. In this case I used "clip AX+B" as a filter type, as I needed a rather uniform texture. There are also altitude or slope dependent modes that spread the colors according to their position or to the terrain they are on. If you have trouble getting the result you want, try the reset command and start over. Finally, something I discovered while making this tutorial: click on the "combination" view or alt+click in another view and enjoy :-)
Mixing the textures
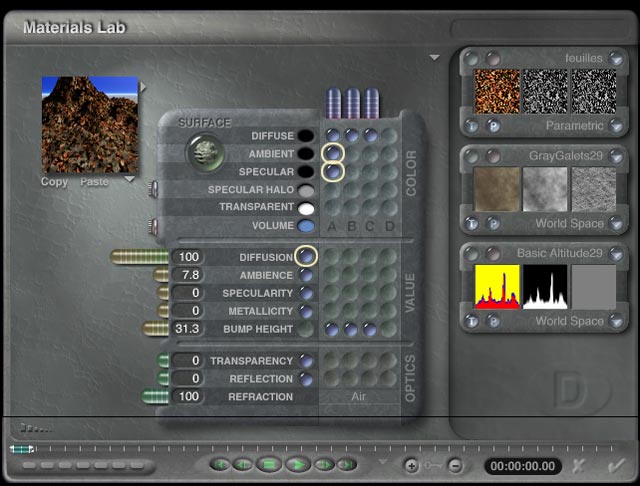
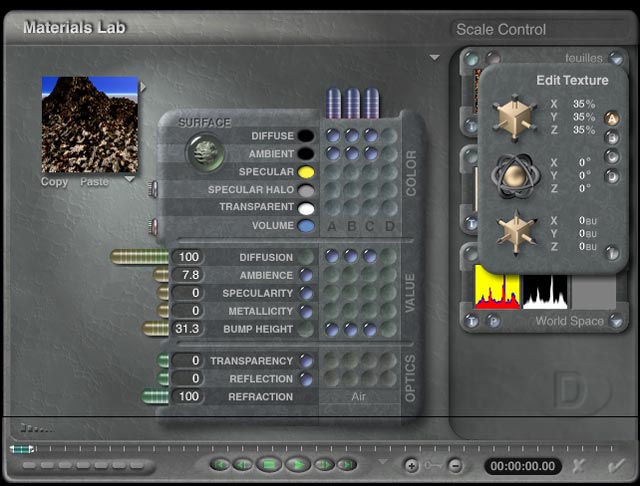
Validate the texture and go back to the Materials Lab. Now we have both of the textures that will be on this terrain, but they still do not look right. Modify the ambient, specular and diffusion parameters to get more natural colors. Then exit the Materials Lab and make a test render. Not very good. In my case there are leaves everywhere, I can't see the ground. It might look a bit different depending on the altitude of your terrain. We now have to tweak the mixing of the textures. To do so, you need to edit "basic altitude" in the Deep Texture Editor.
As its name indicates, this texture is based on altitude. We will edit it to get the mix we want. In this case: the leaves texture on the top of the terrain, the ground elsewhere and random leaves scattered everywhere, but not too much of them.
The only thing we need to edit here is the noise octave of this texture. Set it to 3. This change will reduce the randomness of the position of the leaves. Once you're done, you can exit the Deep Texture Editor.
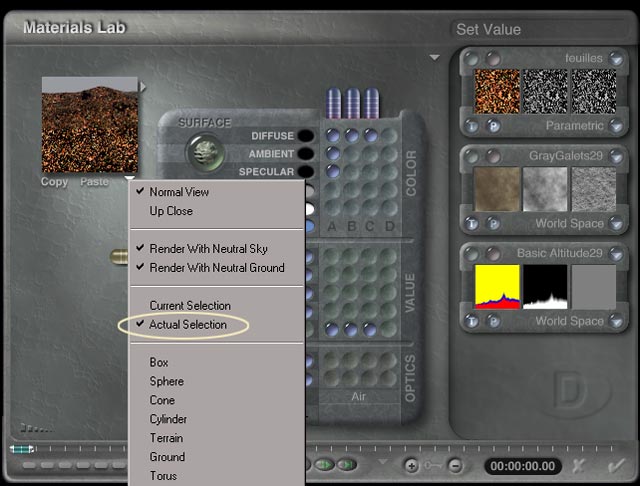
In the Materials Lab, switch to "actual selection" to see how the material looks on your terrain. Then change the frequency of the "basic altitude" texture. As you decrease it, you will see the amount of leaves decrease too ! Exit the Materials Lab and render.
It might not be perfect from the first time, but you can still tweak the different parameters you used for this material. Remember that:
- Texture 2 is used to control the ground color. You can change it to an altitude sensitive texture, modify its noise, its colors, etc...
- Both noises in the "basic altitude" texture control the randomness of the leaves distribution
- The vertical distribution of the leaves is controlled by the frequency of the "basic altitude" texture.
- If you are looking for effects based on altitude, be sure to use the "world space" mapping mode for the textures.
This technique can be applied every time you need mix of textures based on altitude. But if you change the filter type of the "basic altitude" texture you will be able to mix textures on almost every object and not only in an altitude-dependent mode !
