Using Crazybump with Vue
This tutorial will show how to create very realistic bump maps for terrains or other Vue objects with a fascinating app called Crazybump.
What you will need to complete this tutorial
- A copy of Crazy Bump. You can get a demo version on their website.
- A pebble or ground texture. I got the texture used in this tutorial on CG Textures
- A working knowledge of Vue.
Creating the bump map
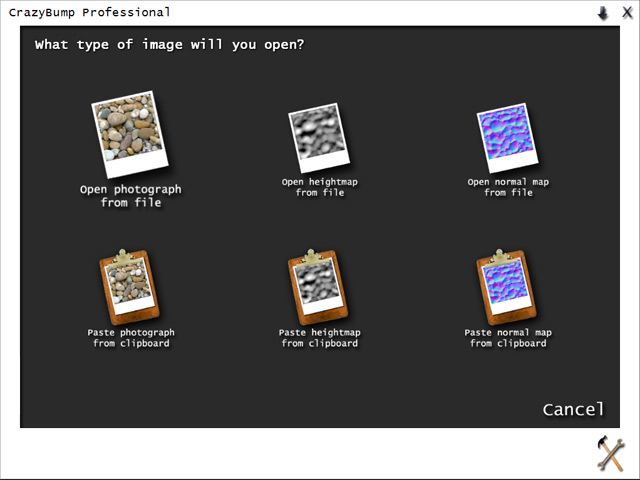
Fire up Crazybump and import the map you want to work on. Most maps with obvious bump mapping will work. The most interesting ones I have tried so far are stone walls. Bricks are sometimes tricky to work on. Ideally, the map should be square and tileable in all directions.
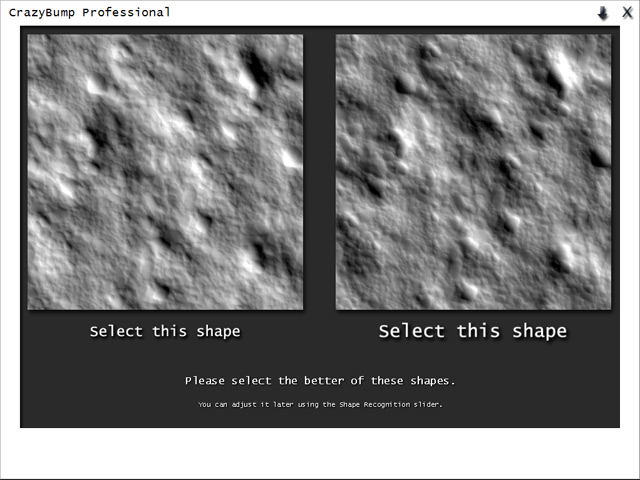
Once the texture is chosen, Crazybump will "think" for a few seconds and then ask to choose a guide for the shape recognition process. It basically shows two opposite versions of the texture : one with a shade treaded as bumps, the other with the opposite shade treated as bumps. In this case, I chose the second one as pebbles clearly appear bumpy.
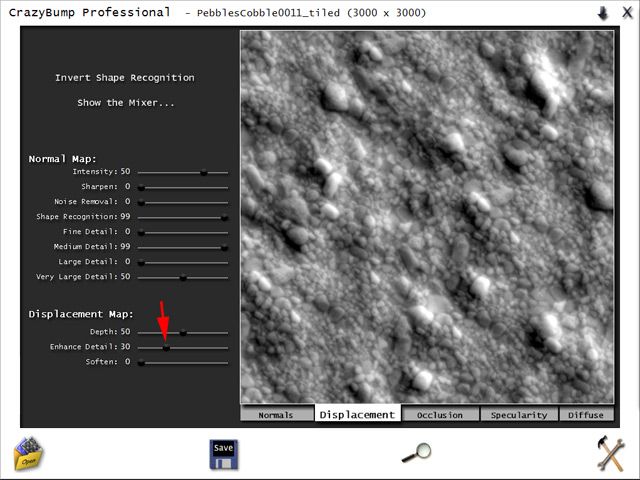
Crazybump will then present you with the results and five different tabs:
- Normals: this one is not supported by Vue
- Displace: this one will make the bump map for us
- Occlusion: I generally do not use this one
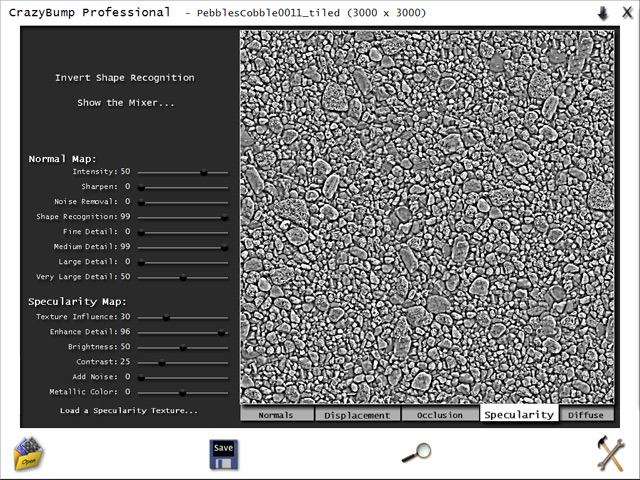
- Specularity: may be useful for some materials
- Diffuse: this one can be used only to suppress shading or highlights in a material
We will adjust slightly the displace settings. By default, they do not show much detail. To make finer and more detailed bump maps, slightly push the "enhance details" slider to the right. Values of up to 75 can be useful in some cases. Higher values may generate artefacts or details too fine to be realistic.
The result of your tries will appear in a rotating 3d view on the right hand side. Once satisfied with them, click the small disk and save the displace map. You may simply choose the same name with a _DISP suffix.
For this example, I also exported a specularity map, using the detault settings.
Working in Vue
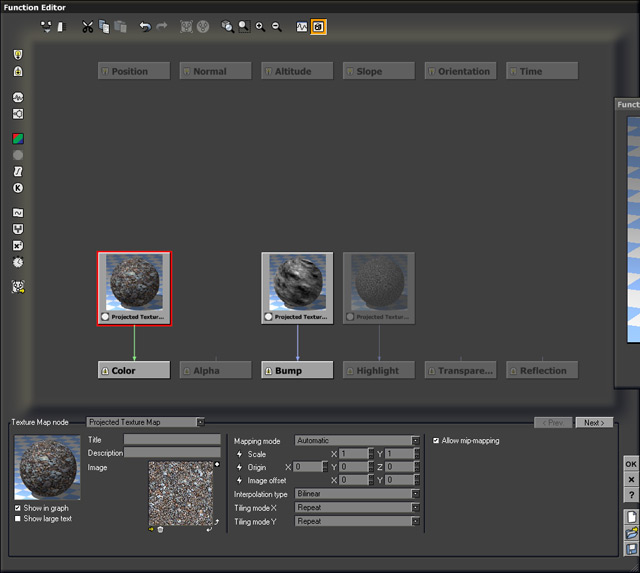
Now that you have your maps, open Vue and create a simple terrain. Flatten it a bit and CTRL+click the material preview icon to enter the material editor. Right click or CTRL + click the color production preview to enter the function editor.
Import all three bitmap textures (diffuse, displacement and specularity) and link them to the relevant outputs at the bottom.
Validate and exit the function editor. Reduce the amount of bump to 0.5.
Making a test render should normally show a fine looking bumpy terrain, but you can further improve it
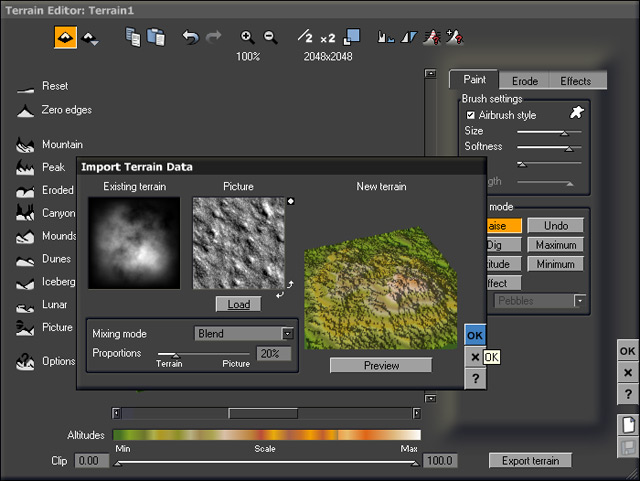
With the terrain selected, make CTRL+E to edit it. Increase the terrain resolution to 2048*2048 or whatever resolution you use. Import an image of the bump map and blend it with the terrain. Blending values of 10% to 30% are generally enough.
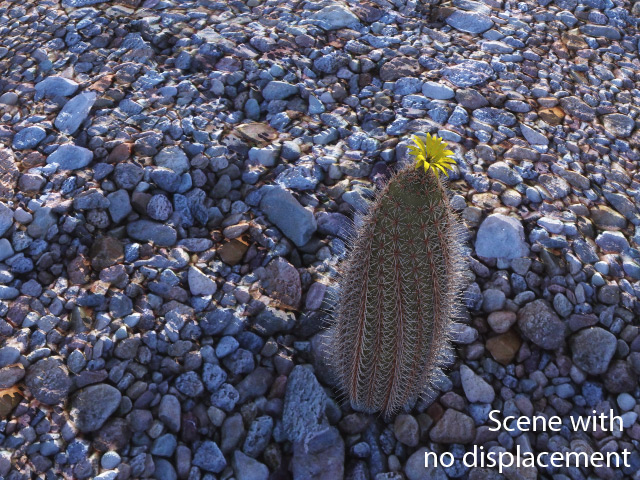
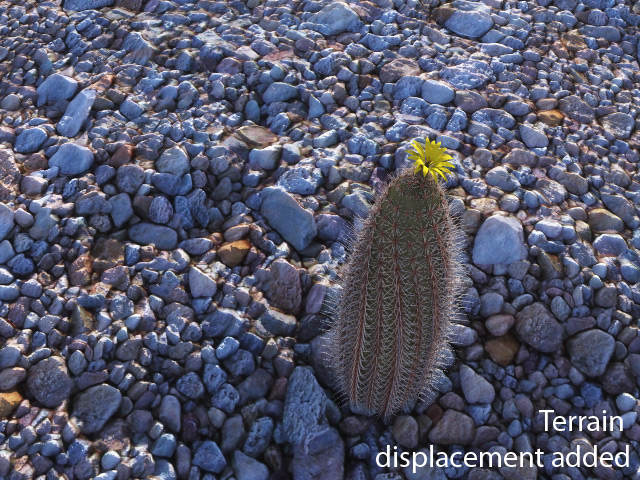
This last view shows the render I made. The default view has no displacement.
